
Assembly instructions & safety information
Version 1.0 – 2026-02-
Before you start
Product information & safe handling
This product is a handcrafted metal item intended for indoor use.
Because the product is handmade, minor variations in shape, dimensions and surface finish may occur.
- The product is made of metal and may have hard or sharp edges.
- Handle it carefully when unpacking, installing and removing it.
- Keep the product out of reach of children before installation.
Installation method 1
Installation (double-sided tape)
Steg 01
Clean the surface
Clean the surface thoroughly so that it is completely free from dust, grease, dirt and moisture. Preferably use a mild detergent or an alcohol-based surface cleaner. Let the surface dry completely before installation begins.
Steg 02
Remove the protective backing
Remove the protective backing from the tape without touching the adhesive surface with your fingers, as this can impair adhesion.
Steg 03
Position the product
Place the product in the desired position and check carefully that it is straight and correctly aligned before you press it into place. Please note! Once the tape has bonded to the surface, adjustment can be difficult without affecting the adhesion.
Steg 04
Press it firmly into place
Press the product firmly against the surface with even, strong pressure for about 30 seconds. Be particularly careful to apply pressure across the entire surface, and extra pressure in corners and along edges, to ensure optimal adhesion.
Steg 05
Wait before use
Wait at least 20 minutes before use.
The product is intended to be installed on clean, dry, smooth and solid indoor surfaces. For the best adhesion, the surface must be free from dust, grease, silicone and other dirt-repellent substances.
Recommended surfaces are smooth tiles, glazed floor tiles, glass, metal and well-varnished or hard-painted wood.
Installation is NOT recommended on wallpaper, plasterboard, filled or porous surfaces, untreated or unvarnished wood, newly painted surfaces (less than about 30 days), uneven or textured surfaces, tile grout, or surfaces with silicone, Teflon or dirt-repellent treatments. The product should not be installed on surfaces exposed to strong heat, constant moisture or a direct jet of water.
Incorrect installation, overloading or installation on an unsuitable surface may cause the product to come loose and result in injury to persons or damage to property. The product is intended for light loads.
During removal, the product must be detached slowly and in a controlled manner. Incorrect removal may damage the surface.
Select a product below to see a detailed installation video.
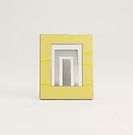
Wall-it TB
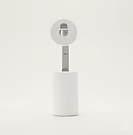
Wall-it TH
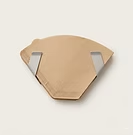
Wall-it KF
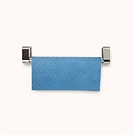
Wall-it DT
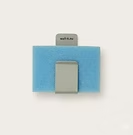
Wall-it SH
Installation method 2
Installation (adhesive)
The product is installed with a strong construction adhesive, which provides a durable, drill-free installation. The adhesive is particularly recommended on surfaces where double-sided tape does not bond well enough, for example painted plasterboard, wood or textured surfaces, and in public environments where extra durability is required.
Steg 01
Clean the surface
Clean the surface thoroughly so that it is completely free from dust, grease, dirt and moisture. Preferably use a mild detergent or an alcohol-based surface cleaner. Let the surface dry completely before installation begins.
Steg 02
Apply the adhesive
Apply the adhesive evenly to the back of the wall bracket according to the adhesive manufacturer's instructions. Avoid applying too much adhesive, as excess can be squeezed out and cause stains.
Steg 03
Position the product
Place the product in the desired position and check carefully that it is straight and correctly aligned before you press it into place. Please note! Once the adhesive has bonded to the surface, adjustment can be difficult without affecting the adhesion. Also note that there is a small piece of double-sided tape at the bottom centre of the product. It only acts as support while the adhesive cures and is not the main fastening.
Steg 04
Press into place and let it cure
Press the product into place with even pressure across the entire surface, especially in corners and along edges. Let the adhesive cure completely according to the adhesive manufacturer's recommended drying time, usually about 24 hours, before the product is loaded.
The product is installed with strong adhesive on clean, dry and solid indoor surfaces. For the best adhesion, the surface must be free from dust, grease, silicone and other dirt-repellent substances.
Recommended surfaces are smooth tiles, glazed floor tiles, glass, metal and well-varnished or hard-painted wood.
Installation is NOT recommended on wallpaper, plasterboard, filled or porous surfaces, untreated or unvarnished wood, newly painted surfaces (less than about 30 days), uneven or textured surfaces, tile grout, or surfaces with silicone, Teflon or dirt-repellent treatments. The product should not be installed on surfaces exposed to strong heat, constant moisture or a direct jet of water.
At the bottom centre of the product there is a small piece of double-sided tape that acts as support while the adhesive cures and is not the main fastening. Incorrect installation, overloading or installation on an unsuitable surface may cause the product to come loose and result in injury to persons or damage to property. The product is intended for light loads.
During removal, the product must be detached slowly and in a controlled manner, as incorrect removal may damage the surface.
Select a product below to see a detailed installation video.
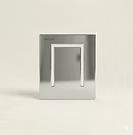
Wall-it TB (Adhesive)
Installation method 3
Installation (screws)
Fastening is done with screws, which is the most robust and permanent method. It suits all surfaces where maximum stability is required or where tape and adhesive do not work optimally.
Steg 01
Clean the surface
Clean the surface thoroughly so that it is completely free from dust, grease, dirt and moisture. Preferably use a mild detergent or an alcohol-based surface cleaner. Let the surface dry completely before installation begins.
Steg 02
Mark the screw holes
Place the wall bracket in the desired position and mark the three screw holes in the product.
Steg 03
Drill and screw into place
Drill the holes and use the supplied screws together with suitable wall plugs matched to the wall material to install the product.
Steg 04
Check the installation
Double-check that it is firmly attached before use.
The screw method is particularly suitable on wallpaper, unpainted plasterboard, wood and other surfaces where adhesive or tape has limited adhesion. Incorrect installation, overloading or use on an unsuitable surface may cause the product to come loose or result in injury to persons or damage to property. The product is intended for light loads.
During removal, the product must be dismantled carefully to minimise the risk of damage to the surface.
Select a product below to see a detailed installation video.
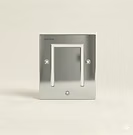
Wall-it TB
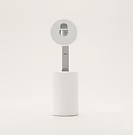
Wall-it TH
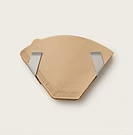
Wall-it KF
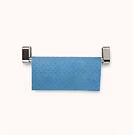
Wall-it DT
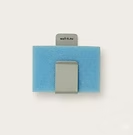
Wall-it SH
Removing the product
Removal
During removal, the product must be detached slowly and in a controlled manner. Incorrect removal may damage the surface.
Detailed removal instructions and the accompanying images/video will be added once the material is provided.
Having trouble with the installation?
Contact us here: pfp@wall-it.nu